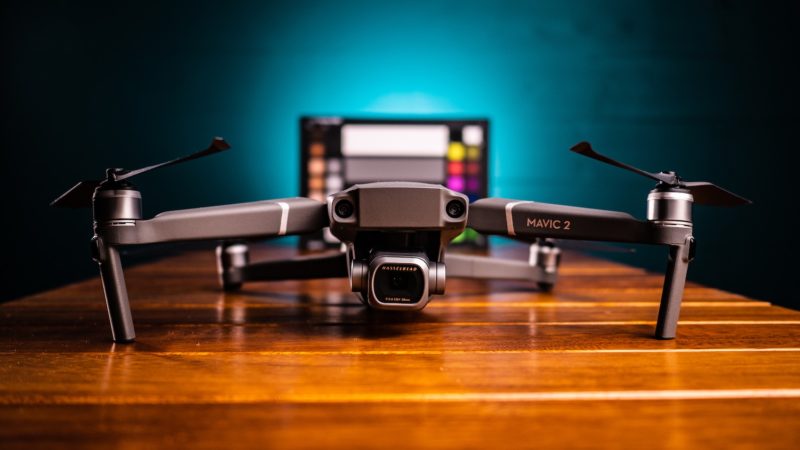
How to Adjust Continuous Dji Mavic
There's no doubt that figuring our the best video settings for your Mavic 2 Pro is an important task. However, as regular followers of Drone Film Guide will know, once you have the correct settings dialled in we can focus on the far more important, filmmaking elements of great aerial footage.
Not once have I said to Alina, "that was a great shot because of those great settings!". It's just something you have to get right.
This article will clarify once and for all the best Mavic 2 Pro video settings for any given situation.
All that being said, there is an enormous amount of confusion concerning the best Mavic 2 Pro video settings in particular so let's give you all the answers you need now!
VERDICT
ADVANCED
- Codec: H.265 (10-bit)
- Color: DLog-M
- Video Size: 4K @ 24/25 fps
- Video Format: MOV or MP4
- White Balance: Sunny or Cloudy
- Style: None (0,0,0)
- Manual Exposure
- 📸 ISO 100
- 📸 Aperture f.5.6 – 8.0
- 📸 Shutter 1/50
- 📸 Neutral Density (ND) Filter 16
NOVICE
- Codec: H.264 (8-bit)
- Color: Normal
- Video Size: 4K @ 24/25 fps
- Video Format: MOV or MP4
- White Balance: Sunny or Cloudy
- Style: None (0,0,0)
- Manual Exposure
- 📸 ISO 100
- 📸 Aperture f.5.6 – 8.0
- 📸 Shutter as required to achieve correct exposure without ND filters.
In summary, to get the best video out of the Mavic 2 Pro, you really need to be filming in 10-bit with the H.265 codec and the DLog-M colour profile. As we discuss at length in our Mavic 2 Pro Long Term Review, to film in any other mode really defeats the purpose of buying this 'pro' drone. Unfortunately, the only 8-bit H.264 option available to us is Normal – there is no D-Cinelike! By all means, use this mode if you want to reduce the post-production workflow.Irrespective of whether you shoot DLog-M or Normal, the other recommended settings are the same as you can see above.
MAVIC 2 PRO BEST VIDEO SETTINGS
RESOLUTION
Let's keep this simple – more resolution is better for two reasons (a) images are sharper, and (b) you have the option of zooming and repositioning in post if you plan to export at full HD 1080p. This is a tremendously useful tactic for tweaking compositions in your editing software. As such, when possible, we shoot in 4K.
FRAME RATES (24/25/30 fps)
There is no such thing as a better frame rate – just different frame rates for different purposes. Assuming you want to shoot maximum resolution in 4K, the Mavic 2 Pro allows you to shoot 24, 25 or 30 fps.
25 fps is the real-time frame rate for PAL regions like Europe – simple – if you're in an NTSC region like America, give it a miss. Unlike Europe, NTSC regions have two frame rates for real-time footage – 24 and 30 fps. There's a lot of history behind these two frame rates that we discuss in THIS YouTube video but in summary, 24 fps is the cinema standard and 30 fps is the television broadcast standard.
Choose the correct frame rate for your intended distribution. Personally, I prefer the look of 24 fps and would recommend you go with that.
mavic 2 pro best settings video
mavic 2 pro best settings video
mavic 2 pro best settings video
mavic 2 pro best settings video
HIGH FRAME RATES (48/50/60 fps)
A frame rate higher than 24/25/30 fps is not better, it just serves a different purpose. High frame rates are used for slow motion. For example, video shot at 50 fps can be halved in speed in a 25 fps timeline and the result is buttery smooth slow motion because there are no dropped frames. By contrast, slow down a 25 fps clip and there are no extra frames to fill the gaps. This results in unattractive jumpy footage which is not recommended.
Since capturing higher frame rates is more demanding for the camera, resolution is sacrificed. The Mavic 2 Pro offers 48/50/60 fps at 2.7K. We've rarely used these options as typically with our drone footage we are trying to enhance motion for dramatic effect rather than slow it down. That being said, when shooting people for example, slow motion looks great.
We do not recommend filming at 48/50/60 fps if the intended outcome is real-time footage. In our opinion (and that of the entire film and TV industry) the resulting, 'smooth' footage devoid of motion blur is not pleasing on the eye. In December 2012 Peter Jackson released The Hobbit in 48 fps, revolutionising the cinematic experience – he hoped. The experiment was universally panned by critics as they felt they were watching a news report or a sports broadcast rather than movie at the cinema.
FIELD OF VIEW (FULL FOV vs HQ FOV)
As we discuss in our Mavic 2 Pro Long Term Review, this drone offers two, fixed focal lengths. In addition to the standard wide-angle field-of-view (FOV) of 77° (35mm format equivalent of 28mm), the Mavic 2 Pro introduces a so-called HQ FOV (or what I would call "narrower FOV") of 55° (35mm format equivalent of around 40mm).
With no perceptible difference in quality between the two (despite DJI's decision to use the term HQ FOV), it's a question of creative choice as to which you choose. Full FOV is perfect for big landscape shots where the desire is to capture as much of the scene as possible. By contrast, HQ FOV is an excellent addition that enables us to get closer to a subject without necessarily flying closer. Perfect for filming people.
EXPOSURE SETTINGS
USE MANUAL EXPOSURE
Much like white balance, you don't want your exposure to change during filming so in this respect, 99.9% of the time you will want to set your exposure to manual .
Manual exposure is controlled three ways:
- ISO: Sensitivity of the sensor to light.
- Aperture: The iris in the lens that physically controls the amount of light hitting the sensor.
- Shutter speed: The length of time the shutter stays open, thereby controlling the amount of light hitting the sensor.
Let's look at them in individually, specifically with reference to the Mavic 2 Pro.
mavic 2 pro best settings video
mavic 2 pro best settings video
mavic 2 pro best settings video
mavic 2 pro best settings video
ISO
ISO, aperture and shutter speed each have a secondary effect on your image you need to be aware of. Increasing the ISO increases the noise in the image. Particularly visible in the shadows, we want to keep the noise to a minimum. If possible, shoot on 100 ISO to keep the noise to a minimum. In fact, because of the small sensors on these DJI drones, to date, our advice has been ONLY shoot at 100 ISO.
That being said, we've done the tests and concluded that thanks to the fantastic light-gathering capability of the 1 inch sensor on the Mavic 2 Pro, the resulting low-noise image means it is possible to crank the ISO up to 800 if required. Refer to our Mavic 2 Pro Long Term Review if you want to see a video comparison of various DJI drones at 800 ISO.
APERTURE
The secondary effect of changing aperture is depth-of-field (DoF), i.e. the amount of the image that is in focus. In reality, given the wide angle field-of-view, shallow depth-of-field (typically when the background behind a subject is blurry) is not something we have to worry about here.
Like the Phantom 4 Pro, the Mavic 2 Pro has a variable aperture ranging from f/2.8 to f/11. We did some tests to see if the Mavic 2 Pro's image quality is affected by changing the aperture and for the pixel peepers amongst us, it could just be argued that at f/11 there is a minor drop off but certainly not something that would stop us from using f/11.
Since aperture is not a means of influencing depth-of-field with the Mavic 2 Pro, what is the point of it? Well, where we've found it particularly useful is adjusting exposure while flying if we are using neutral density (ND) filters and lighting conditions change mid-air. We'll get to that in the next paragraph but for now, set aperture somewhere in the middle – f/5.6 to 8.0.
SHUTTER SPEED AND NEUTRAL DENSITY (ND) FILTERS
The secondary effect of changing shutter speed on your Mavic 2 Pro is motion blur. Unlike photography, in videography, we want a little motion blur on each of the frames that make up your moving image. Picture a car zooming past you in the street – can you read the number plate? No you can't – there is blur. Since we are trying to simulate real life in our filming, we want our video footage to have some motion blur.
The 180 degree rule convention dictates that in order to achieve motion blur the eye is accustomed to we should 'double' the frame rate. As such, 24/25 fps real-time footage will have a 1/50th shutter. If you've tried filming on a sunny day however you'll know that with ISO 100 and aperture at f/5.6, you need a shutter of around 1/500th to achieve a balanced exposure. Fix the shutter at 1/50th in the pursuit of the correct motion blur and you have a completely overexposed image.
mavic 2 pro long term review
mavic 2 pro long term review
The solution to this problem is neutral density (ND) filters. This partially opaque piece of glass cuts down the amount of light hitting the sensor, allowing you to maintain a 1/50th shutter for that realistic motion blur. For our Mavic 2 Pro, 99% of the time we film with an ND16 attached to the camera. This cuts out just the right amount of light so that with ISO at 100 and aperture around f/5.6 – 8, we can set a 1/50th shutter.
If lighting changes when you are flying, just adjust the aperture! It all comes together beautifully for setting a manual exposure on the Mavic 2 Pro. By contrast, when flying a fixed aperture drone like the Mavic Air, if the light changes significantly when flying then the only option is to land the drone and change the ND filter.
turcocionfibed1954.blogspot.com
Source: https://dronefilmguide.com/mavic-2-pro-best-settings-video/
0 Response to "How to Adjust Continuous Dji Mavic"
Post a Comment